
Blogs, Cold storage logistics,
Blogs, How-to, How-to, New features
Date
16 December, 2021
Reading time
4min. reading time
Digitizing your workflows helps to make your processes more efficient. It is no surprise that almost everything around us happens digitally and that you have set up your operations almost completely paperless. However, printing is still an essential part of your process. You regularly print documents or ZPL labels from 3PL Dynamics. But, in a process in which everything is determined by speed and efficiency, this must go as smoothly as possible. Only in that way, you can keep focusing on the services you provide to your customers. With that in mind, Boltrics developed the BoltricsService. Formerly known as the Boltrics Print Service. This service, however, does not limit itself to supporting your print activities. With the same service, you can for example also integrate your scales with 3PL Dynamics. The possibilities are infinite.
Let’s focus on printing. In most situations, it is not possible to send orders to the printer directly from 3PL Dynamics. For this, the BoltricsService offers the solution. Print jobs are sent from your logistics software solution to the service, which then sends it to the printers in the office or in the warehouse. In that way, you do not have to compromise on efficiency.
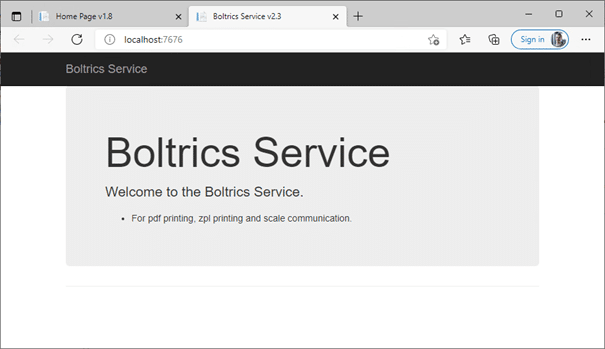
Recently, we have worked hard to update the BoltricsService. And not only the service itself. Also, the installation script has undergone some big changes. For example, you now automatically download the most recent version when executing the installation script – at the moment of publishing this blog, this is version 2.3. Furthermore, the new version has a completely new look and feel. No standard ASP.NET page. But a user-friendly landing page.
1. Download the documentation about the BoltricsService: https://bpbcdownloads.blob.core.windows.net/software/BoltricsService/BoltricsServiceInstallation.pdf. Mind the needed firewall rules, and make sure that the portal your service runs on is open.
Standardly this is portal 7676.
2. Open PowerShell as administrator, and execute the script on the last page of the documentation. In this way, you automatically install the most recent version of the BoltricsService. Completed in under a minute. Do you already use another version of the service? No problem! The script will automatically update the current service with the latest version.
3. Install the BoltricsService on the server your printer drivers are installed on. In that case, you do need extra adjustments and everything works as you would expect. Do you want to use the service on a different server? Then find out what extra steps you must take to install the printers correctly in the rest of the blog.
In order to make calls to the service from 3PL Dynamics, the message types SND-PDF and SND-ZPL must be setup. To do so, you need the dns record, or external IP address, of the server the BoltricsService runs on. Get started yourself. And set up the BoltricsService with the help of the video below.
What messages are specifically sent to what printer, can be set up under ‘User Printer Selection’. Here, you can fill in the name of the printer or the internal IP address of a ZPL label printer. Standard, portal 9100 is used for a ZPL printer. Optionally, you can set up different portal numbers under ‘User Printer Selection’ as well.
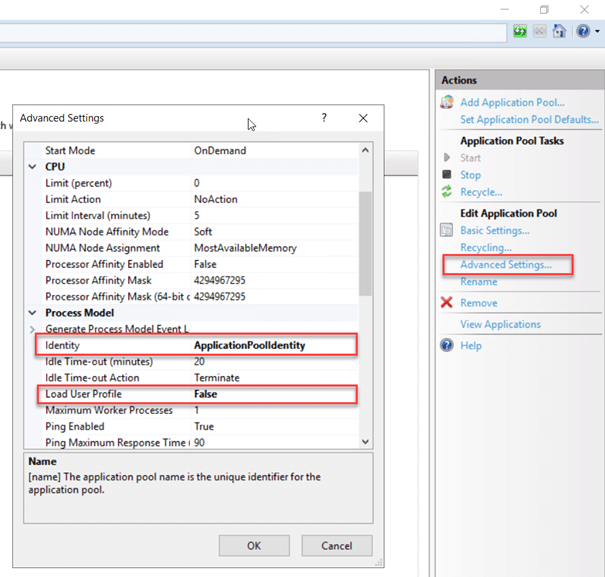
The BoltricsService runs standard in IIS, under an Application Pool Identity. This, however, does not have enough rights to connect with a network printer. To be able to do connect with a printer, the service must run in IIS under a domain user, who has the rights to print. From version 2.3, it is no longer needed to install print drivers for the domain user. This is done automatically if needed. This makes printing your documents even more simple and helps you to focus on your main task: logistics.
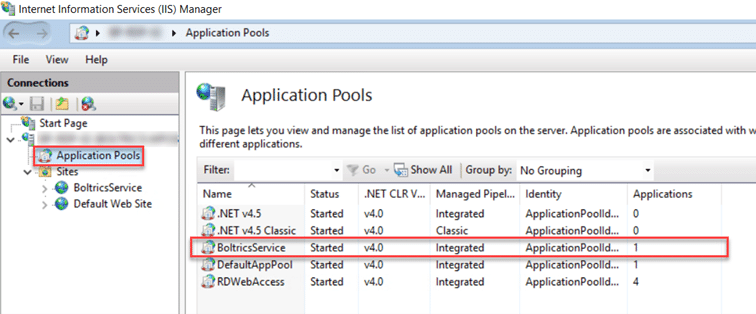
You can change the Identity of the Application Pool in IIS with the help of the following steps:
1. Go to IIS (Internet Information Services), open the Application Pools, and select the BoltricsService.
2. Go to ‘Advanced Settings…’, and change the following two settings:
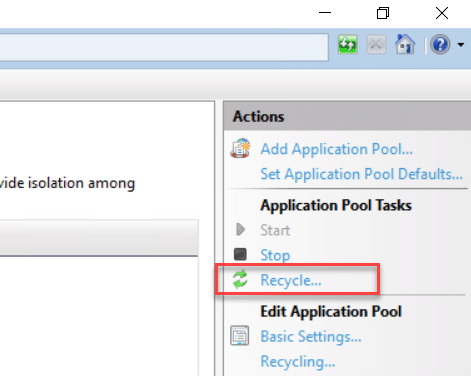
3. Click on ‘Recycle…’ to restart the Application Pool
Do you want to learn more about the possibilities of the BoltricsService? Or do you need help installing the newest version of the service? Mail to request@boltrics.nl.